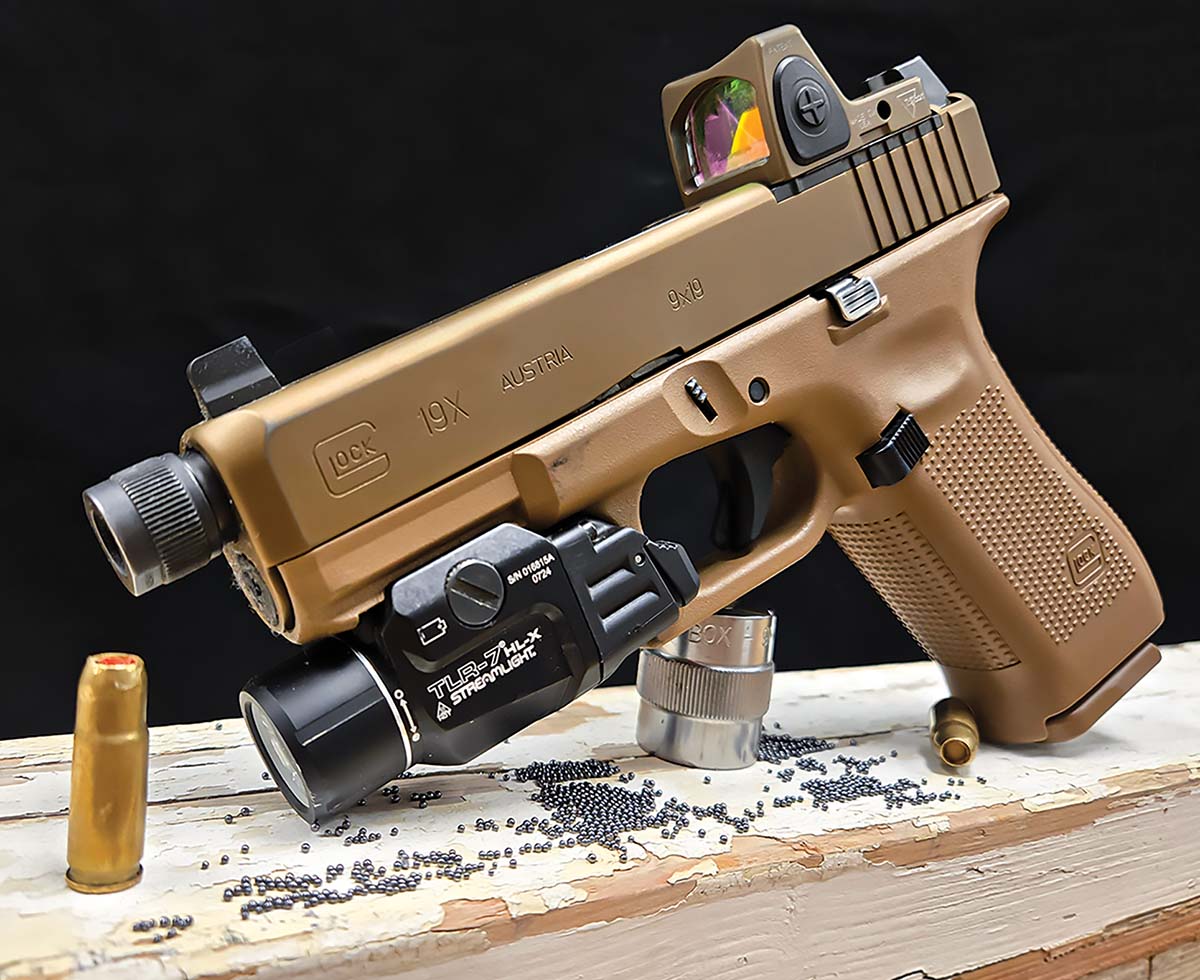
The primary test gun was a Glock 19X MOS with a Trijicon RMR and Streamlight TLR-7 HL-X weapon-mounted light. It is the author’s primary carry gun for field work and while hunting in Arizona.
One early morning, while sleepily strolling from the kitchen to the front door to check outside, the dog began barking aggressively before I could open the door and step out. Peeking out the window, a quick glimpse of a rattlesnake was seen, posed perfectly to strike at any unsuspecting dog or person who would have walked out the front door. The dog was snake trained and had certainly saved more than just me from stepping too close to danger. Deciding this snake was too close for comfort, I carefully went out the back door and dispatched the snake with an Uberti Cattleman in 45 Colt loaded with you guessed it, snake shot. I was a lot younger then, but it set in motion a desire to develop more effective snake loads. An amount of close encounters followed: my Dad nearly picking up a rattlesnake coiled inside the coils of a garden hose, dogs coming within inches of striking distance of the venomous creatures and horses chomping away at feed, not realizing that they were inches away from a potential sneaky snake strike. Where we live and hunt these are some of the dangers we have to be aware of, so we take measures to protect ourselves as well as our animals.
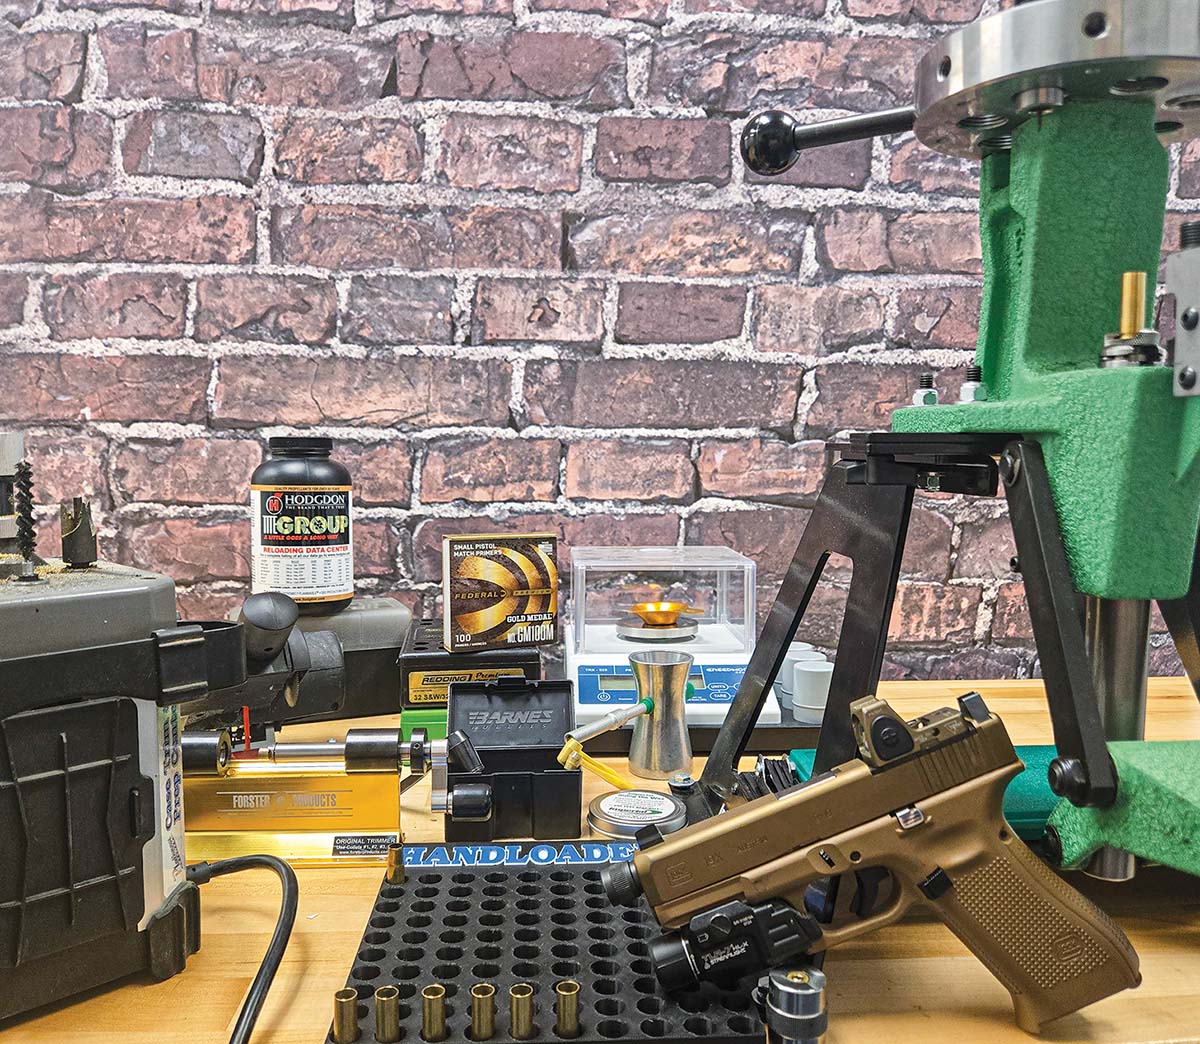
Some of the components and tools used to assemble the 9mm Luger Snake Shot loads. Working in batches smoothes over the labor-intensive process, making it much more efficient.
During the last decade or so, I have been working on various snake loads from 45 Colt down to 9mm Luger, which happens to be the subject of this article. We have a video on the 45 Colt snake loads I have developed on our YouTube channel, Handloader TV. By comparison, the 45 Colt load was much easier to develop; it was fired from a revolver with a large payload and there was no need for it to cycle the action of a semiautomatic. The case itself allowed ample room for a large shot payload and if so desired, I could even seat a lightweight cast bullet for a “duplex” load to increase its lethality and effectiveness. Which, unfortunately, is the complete opposite in the case of the 9mm Luger, no pun intended. We lack the space to detail the numerous experiments conducted to optimize the effectiveness of 9mm Luger snake loads. Over the course of about 2 years, I finally had the process refined and the effectiveness optimized for my own applications. The process for this is a bit lengthy and a bit tedious, but if working in decent-sized batches, one can assemble enough ammunition to last a long time in a single batch. Unless shooting aerial targets with your favorite 9mm loaded with snake shot becomes a regular occurrence.
The process starts with a 223 Remington case, I tend to use cases that have a few firings on them and see this as their final duty before they give up the ghost. Annealing the cases can certainly help in the forming operations but is generally not required. The 223 Remington case head is only about .009 inch smaller than the 9mm luger. As a result, this will work and function perfectly as our parent case for the 9mm shot shell we will be crafting. I start by running the case into a 223 Remington full-length sizing die. Although this step may be unnecessary, I make it a habit for consistency. I then make a rough cut on the case, shortening it to about 1.135 inches, which removes the shoulder and gives us a short, straight-walled case. A Harbor Freight 2-inch Mini Cut-Off Saw works very well for this purpose. I then make a final trim to 1.110 inches using a Forster Original case trimmer, which ensures we have a nice, clean case mouth with a uniform finish. Then, a slight chamfer and debur is applied, usually with some sort of case prep station and for the next steps, a turret head press makes this process much easier. However, if working in batches, it certainly can be accomplished with a single-stage press.

The case forming process from start to finish: (1) A fired 223 Remington case full-length sized, (2) a rough cut is made to remove the shoulder and shorten the case. (3) a final trim uniforms the case mouth and sets the OAL at 1.110-inches, (4) a Redding 32 H&R die set to create a false shoulder about .755 inches from the base forms the case – the case is then charged with powder shot and wads which are seated using a Redding 32 H&R magnum expanding die and (5) the final step is to crimp the wad in place and roll the edge of the case to form the cone shape, promoting proper feed and function in the firearm.
The shortened 223 Remington case is then run into a 9mm Luger full-length sizing die to iron out any dings. In this test a Mighty Armory Full length 9mm Luger die was used. The sizing at this point should be very minimal and the case should go in with minimal effort. Then I run the case into a properly adjusted Redding Carbide 32 H&R Magnum full-length sizing die. This die is set to form a shoulder on the case where the case mouth would headspace in the barrel of your firearm. This measurement does have some variance depending on the exact chamber of your firearm. However, forming the center of the shoulder at about .755 inch from the bottom of the case head to the center of the shoulder has proven reliable in a wide array of firearms. Failure to form the shoulder at the proper location can result in case head separations and cracks at the case mouth, all from a lack of proper headspace and the case stretching too much while being fired. A 9mm Luger headspace gauge can be a very handy tool to ensure you are headspacing off of that shoulder. Another option is an appropriately sized headspace comparator to use in conjunction with your caliper to measure the center of the shoulder to the base of the case. Forming the shoulder should be done slowly and carefully, ensuring the case is entering the die evenly and that the shoulder is forming evenly around the circumference of the case – thus creating a false shoulder, if you will, for headspace purposes.
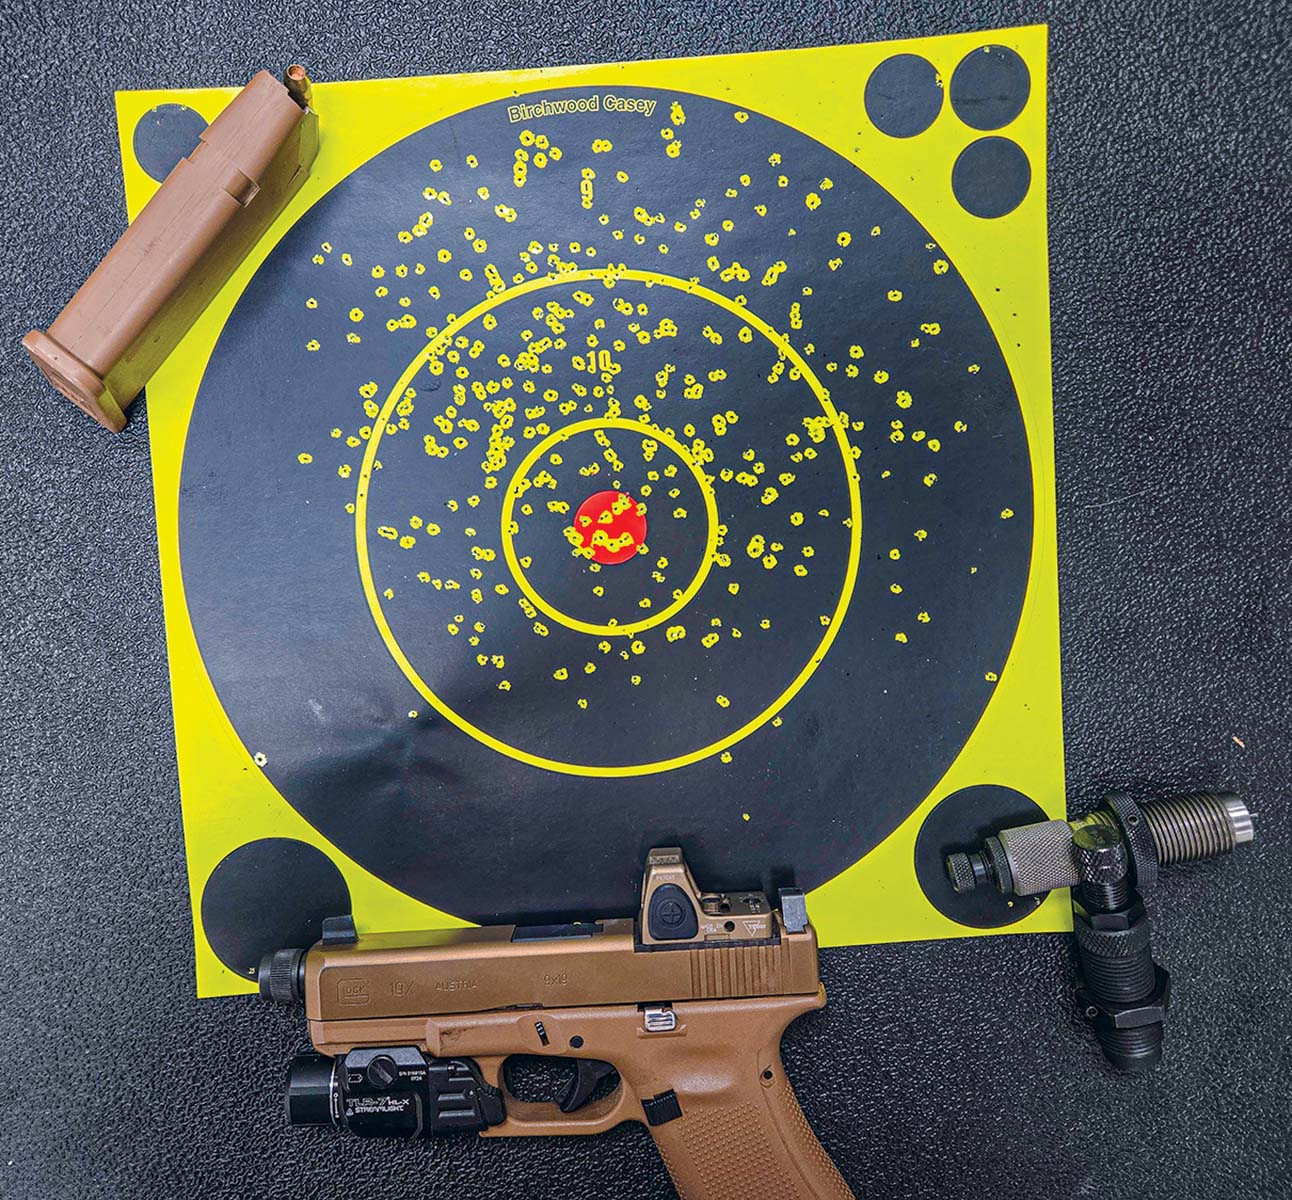
This target was shot at a distance of 5 feet and displays an extremely dense shot pattern that would be more than effective on a snake.
The case can then be primed and charged with powder. For the 9mm Luger, I settled on 2.4 grains of Hodgdon Titegroup, which falls within pressure limitations and is appropriate for cycling the action as well as penetrating snakeskin at reasonable distances. Once the case is charged, a wad is placed over the powder, this wad can be cut out with a .355-inch punch, or a sharpened 9mm case can be hammered through the wad material to cut it. I prefer to use old milk cartons or FEL-PRO gasket material. On occasion, old worn-out felt hats work quite well, but they do take up a bit more space and intrude on shot capacity in our tiny case. To seat the wad, you can use a wood dowel or a 32 H&R magnum expanding die on the press – which is the most effective way I’ve found to seat the wads. With the wad in place, we can fill our case with a shot charge. I have settled on 100 grains of No. 12 shot for this case, which is nearly double the capacity of the CCI shotshell loads. With the case filled nearly to the brim with shot I will then seat another wad using the 32 H&R Magnum expanding die. This seals the case and prevents the shot from falling out and also slightly compresses the shot between the two wads.
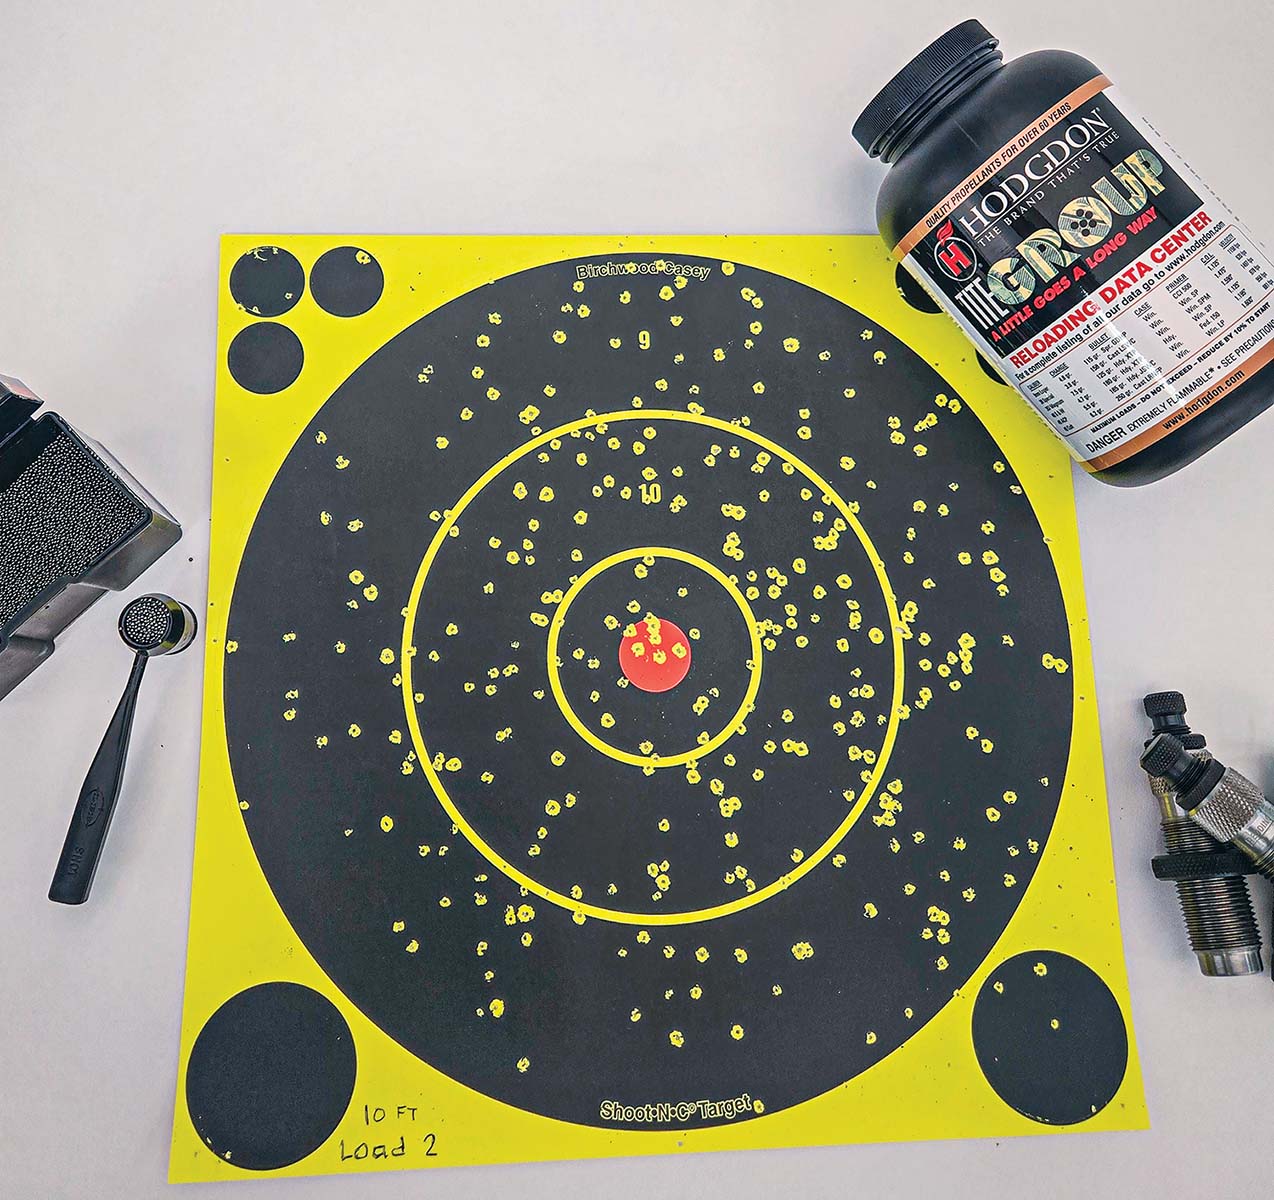
At a distance of 10 feet the shot pattern is just about ideal in terms of density and spread. When forced to dispatch a snake, this is about the perfect distance with this load.
The final step is the crimp. For this process, I highly recommend a Mighty Armory 9mm Luger seating die as their seating stem is extremely strong, will not crack and the geometry is about perfect for this task. It takes a fair amount of force to use a seating die to roll the case mouth into the cone shape we desire for reliable feeding in our firearm. Once the case is “crimped” and the wad is secured in place, you have a ready-to-go 9mm Luger snake shot round that contains a highly effective payload and should reliably function in your firearm. If so desired, you can add a dab of super glue or something similar to waterproof the wad and prevent it from getting wet and losing its integrity.
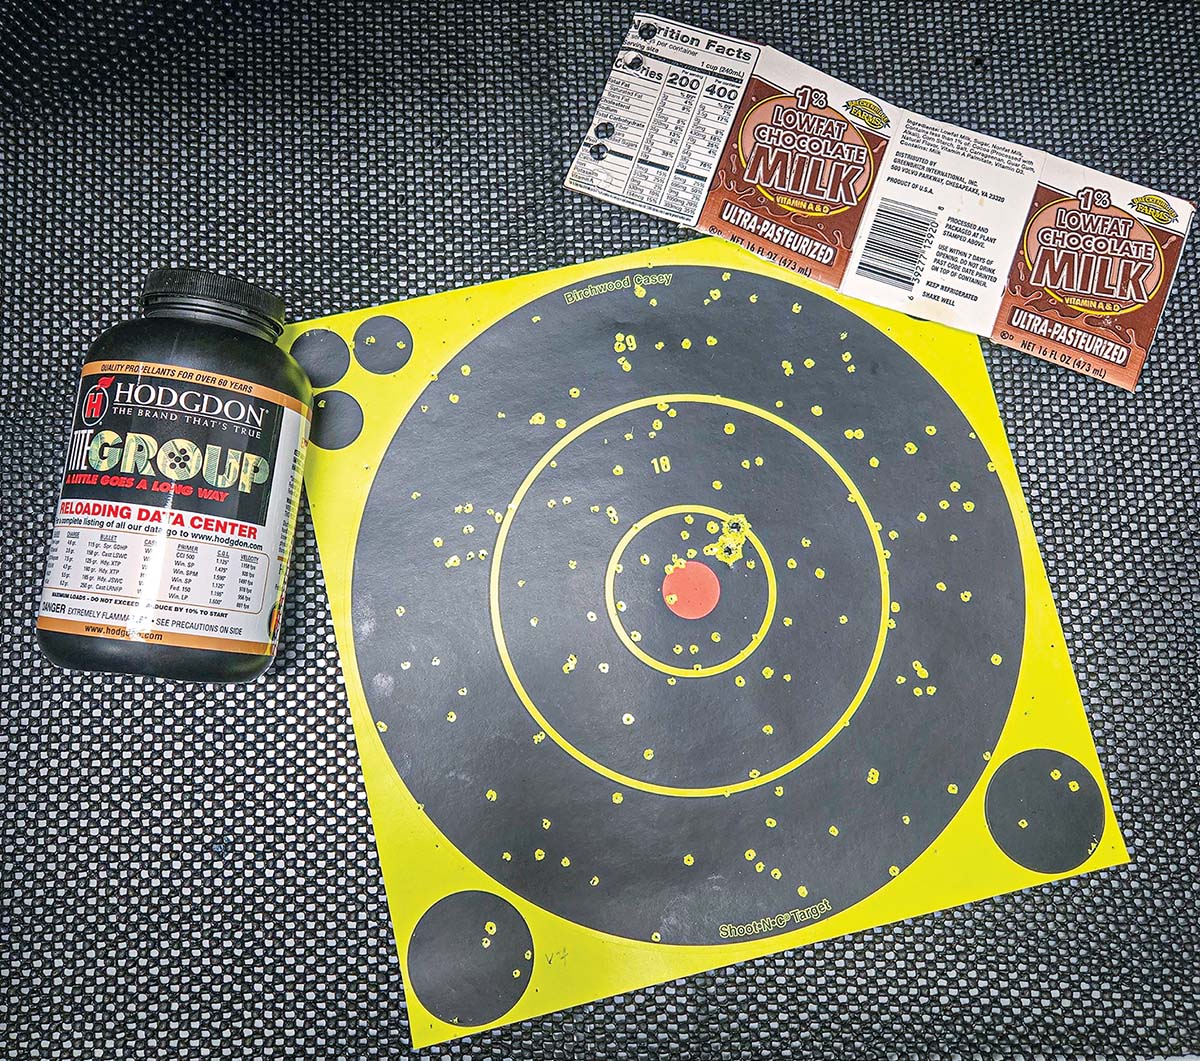
Thanks to the low fat wads, this load still packs a fat punch even at a distance of 15 feet. While the density and pattern opens up quite a bit at this distance it is still effective, and since this load cycles the action reliably, a follow up shot is easy and quick – as can be seen from the two holes from Hornady Critical Duty rounds penetrating the paper.
In testing these on targets, the pattern is effective out to about 15 feet or so, with most snakes likely being shot at closer range, within 10 feet, and the pattern is extremely dense. I have had to use this on snakes and it has proven very effective at stopping them with a single shot at close range (10 feet and in). Most importantly, it reliably cycles the actions of all my test guns, a Glock 19X, Stoeger STR-9, Glock 17, S&W M&P and a Springfield Prodigy. This allows for a rapid follow-up shot of snake shot or, if needed, a full magazine of hollowpoints for larger threats. It also creates a certain “wow” factor when busting hand-thrown clays with your Glock from the Holster and it is great fun! It is something I often carry, adding versatility to a gun I am already carrying in the field while hunting, scouting and even on occasional ranch work. Now you know how to craft some of the most effective 9mm Luger snake loads and can try them for yourself.
If you would like to watch the accompanying video to this article, check out the video titled “9mm Luger Super Snake Shot, the Most Effective Snake Shot on the Market” on our YouTube Handloader TV channel.

.jpg)
.jpg)