
Measurements for Rifle Handloading
Handy Techniques for Accurate Ammunition
feature By: John Barsness | June, 22
One measurement I find myself performing often is of rifling twist, partly because many rifle shooters have gone “semi-loony” over ballistic coefficients. This means increasingly long bullets, and not just jacketed but cast bullets, though the purpose of both is higher retained velocity and less wind drift when shooting at longer distances.
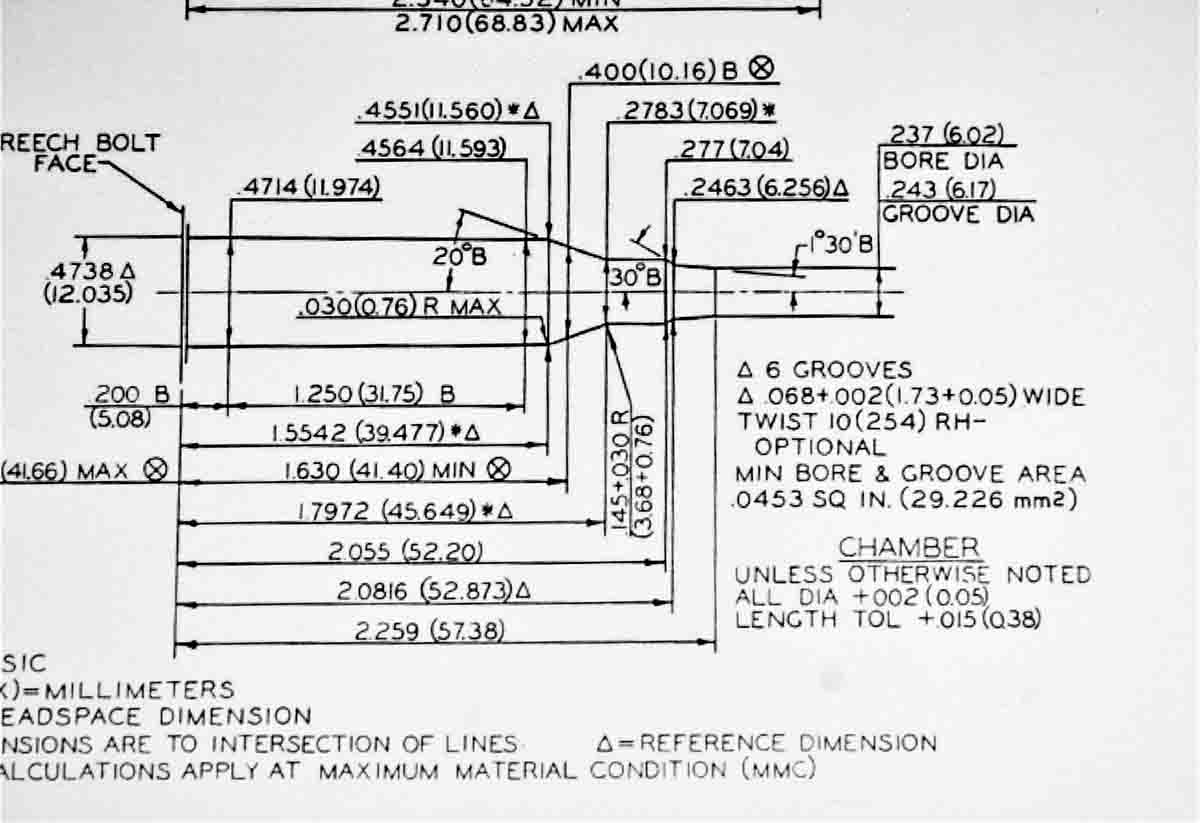
Unfortunately, such longer projectiles may not stabilize in the “traditional” rifling twists used in many older rifles – and even some new rifles. The cartridge drawings from the Sporting Arms and Ammunition Manufacturer’s Institute (SAAMI) also list specifications for the rifling for each cartridge. These include not only twist-per-inch, but the widths of the lands and grooves – though it also includes the word “optional,” meaning members of SAAMI can vary the rifling. This is why my first .243 Winchester, a Remington 700 BDL purchased slightly used in 1974, had a 1:9 rifling twist instead of SAAMI’s listed 1:10 twist.
By then, Remington had corrected the mistake made when it introduced the .244 Remington in 1955, meant to compete with the .243. However, Remington considered the .244 more of a varmint than big-game round, so it gave the 26-inch barrels on the Model 722 rifles a 1:12 twist, because back then, most rifle folks believed a “too fast” twist resulted in inferior accuracy. (It sometimes did when bullets weren’t as well balanced as most are nowadays.)
While a few rifle manufacturers and custom gunsmiths have started marking their barrels with the twist rate, most don’t. (Remington didn’t on my .243). As a result, we often have no clue about our barrel’s rifling twist, which can cause problems with longer bullets.
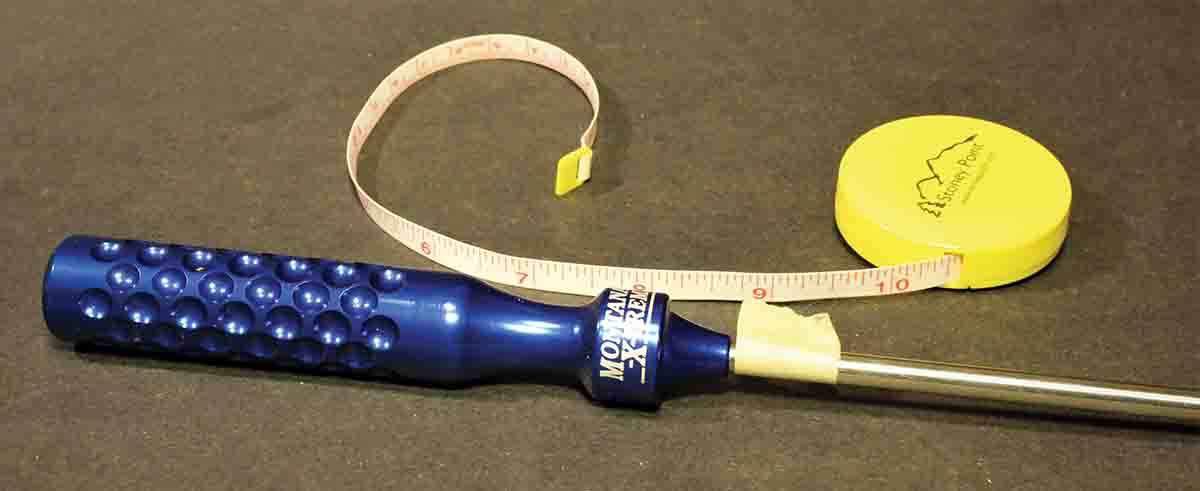
While an internet search can come up with the rifling twists for some factory rifles in a particular chambering, it’s much better to actually measure the twist. All that is needed is an appropriate cleaning rod, bore brush, cotton patches and a yardstick or tape measure. “Appropriate cleaning rod” means not only the correct diameter for the bore, but a ball-bearing handle allowing the rod to easily turn.
The rear of the rod needs to be marked, in order to measure a full turn of the rifling. Most of my rods have a small piece of masking or duct tape in front of the handle, with a “flap” formed by the ends of the tape, allowing me to see when the rod makes a full turn.
Wrap the bore brush with enough dry patches to require some effort to push the brush into the rifling. Next, measure the distance from the front of the rod’s handle to the end of the buttstock on rifles where the rod can be inserted from the chamber end, or from the muzzle if it can’t. Push the rod through the bore until it makes a full turn, then measure how many inches it traveled – which is the rifling twist.
This basic technique has solved many mysteries, including one involving an old .250-3000 Savage 99. Until 1960, 99s in .250 supposedly had 1:14 rifling twists, just enough to stabilize relatively short, 100-grain spitzers, like the Speer Hot-Cor – probably the shortest currently produced, the reason it’s a favorite among handloaders owning 1:14 twist .250s.
This particular 99, however, did not shoot 100-grain Speers very accurately, no matter what powder tried, with some groups over 3 inches. Eventually, even my thick half-Norwegian brain decided to measure the twist – which turned out to be 1:15, no doubt due to the adjustable sine-bar cut-rifling machines used on old 99s. Aha! I switched to the 87-grain Speer Hot-Cor, which cut group size nearly in half.
After you know the twist, use one of several free internet programs to calculate whether a particular bullet will stabilize. I often use Berger Bullets’ Twist Rate Calculator (berger bullets.com), based on a formula devised by the late Don Miller, a friend of mine. However, Berger’s program does not include a factor Don discovered a while afterward.
The major factor in rifling twist stability is a bullet’s overall length, but weight also plays a role, and for a long time almost all rifle bullets were entirely or mostly made of lead, the reason many shooters believe weight is the major factor. However, today’s bullets can be entirely copper or copper alloy and may also feature a plastic tip. Don eventually determined that plastic tips have relatively little effect on stability because they’re so light. JBM Ballistics’ program (jbmballistics.com) also has an input for the length of plastic tips.
Another critical measurement is the loaded bullet’s distance from the lands – if any. Very few hunters seat bullets touching the lands, because if one seats slightly “long” it can be jerked out of the case when an unfired round is ejected. However, some target shooters do seat bullets into the lands, especially short-range benchrest competitors. In fact, an article in the 1997 book The Benchrest Shooting Primer, a collection from the defunct Precision Shooting magazine, is partly devoted to “judging” how deeply a bullet is jammed into the rifling, using the length of the rectangle formed by the lands engraving the bullet. These days, more hunting handloaders (and some competitive shooters) are seating bullets much further off the lands, sometimes as far as 0.1 inch, because many newer rifles shoot more accurately with bullets seated deeper.
For many years, I “found” the lands by slightly crimping the mouth of a fired case, then seating a bullet well out and chambering the round, a technique learned from old-time gun writers. The bullet seating could then be adjusted deeper from that point.
.jpg)
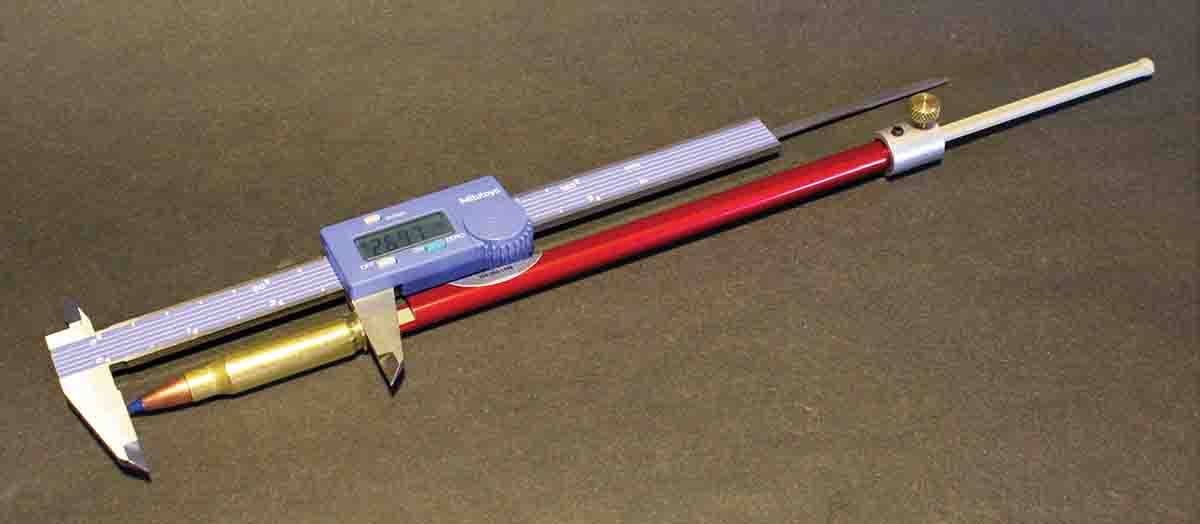
The technique worked, but the distance can be more accurately measured with Hornady’s Lock-N- Load O.A.L. Gauge. These feature a threaded rod screwed into the threaded hole in the head of a modified cartridge case and a neck just loose enough to accommodate a bullet. With a bullet in its neck, the case is inserted into the rifle’s chamber and the rod screwed in until the bullet stops against the rifling. The overall length of the case/bullet can then be measured with a caliper.
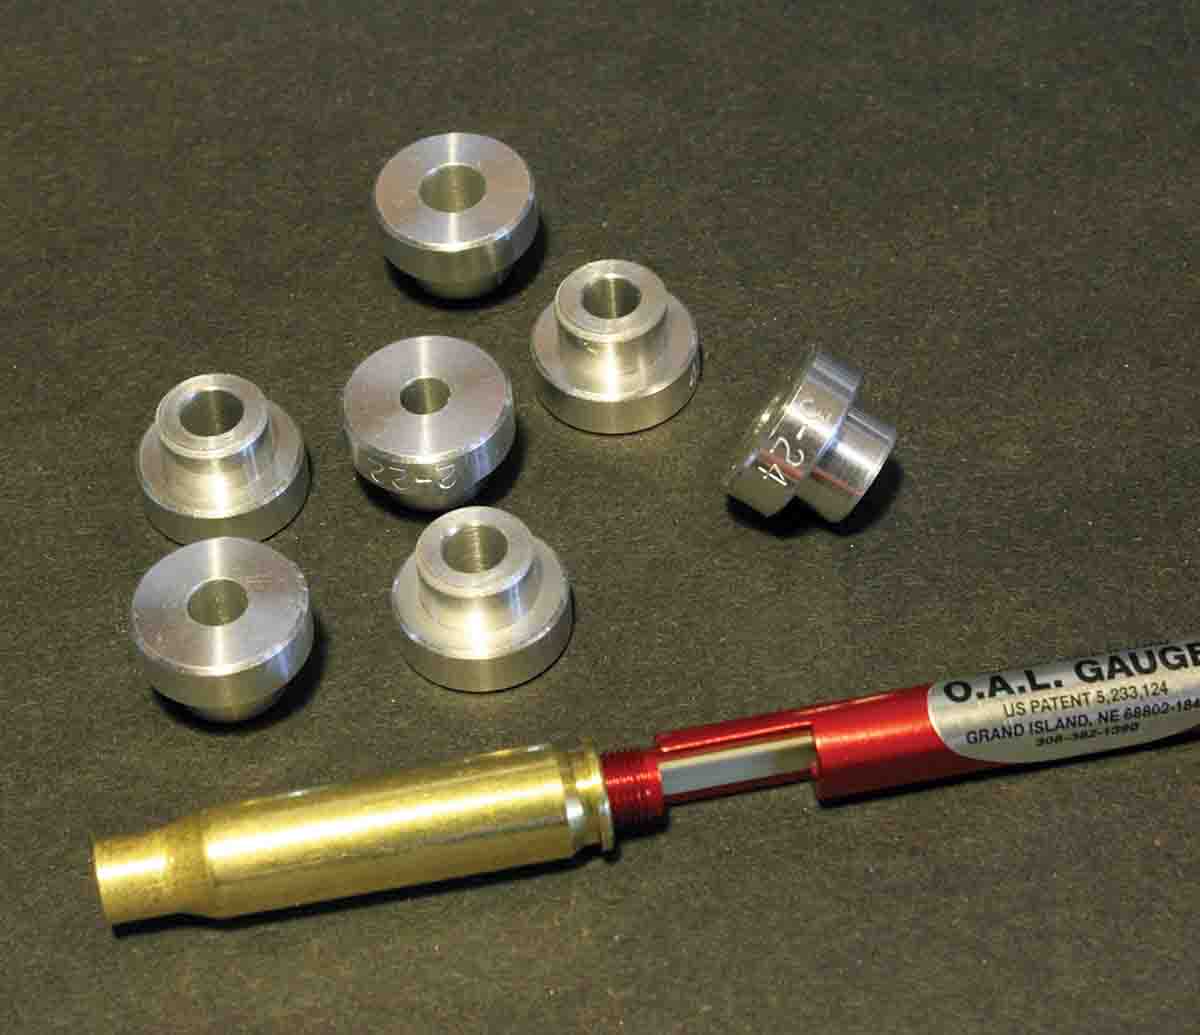
The Hornady gauge can also be used to measure the distance to a specific point on the ogive of seated bullets, using an appropriate bushing for the caliber. This is more precise than measuring the overall length of loaded rounds, though obviously overall loaded length must often be measured to make sure rounds fit and feed correctly in a rifle’s magazine and/or action.
Luckily, seating die “cones” are normally made of relatively soft steel, so they can be easily modified with a drill bit to accommodate different bullet tips. I had to do this recently with the RCBS .17 Ackley Hornet dies acquired with a 30-year-old custom rifle. The seater slightly flattened the points of the 20-grain plastic-tipped bullets I prefer in any .17-caliber varmint round, so I drilled out the tip of the cone a little, which fixed the problem. (Today, some die companies offer seating stems made to accommodate even longer, pointier bullet tips, such as Redding’s VLD Seating Stem.)
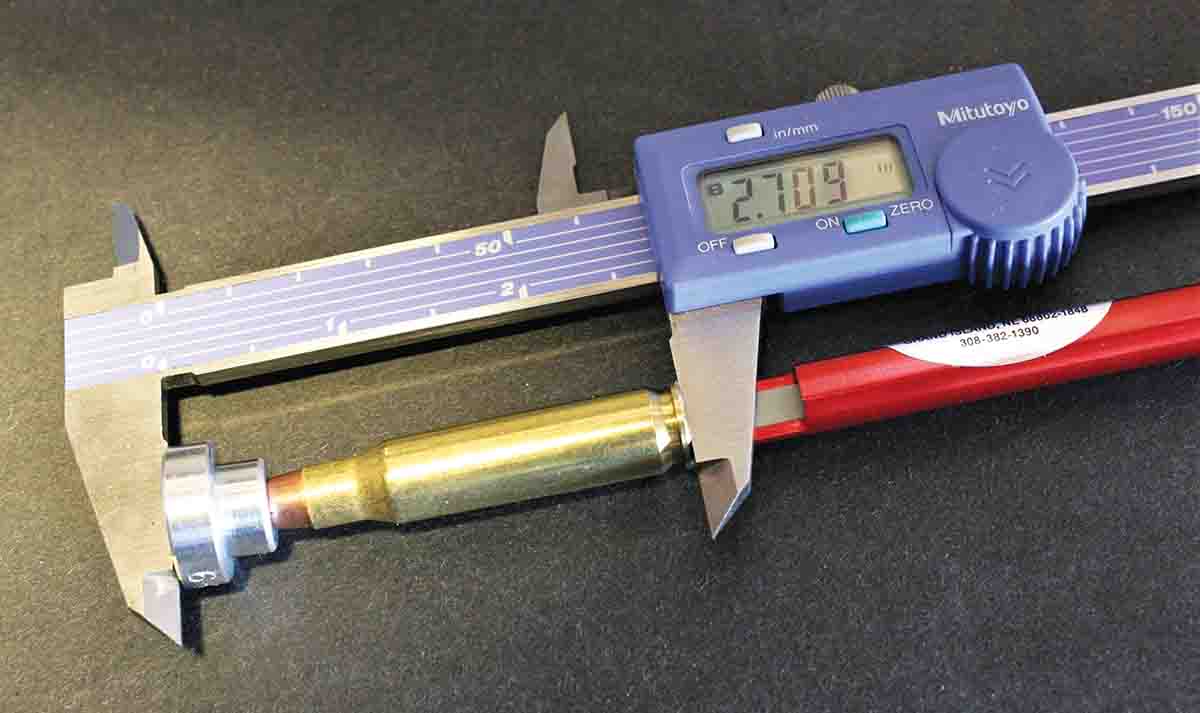
Perhaps the most valuable function of the Hornady tool is measuring the distance from the lands to a specific bullet’s ogive. Rifle bullets of the same brand and model can vary slightly in ogive contour, especially in different manufacturing lots. With the Lock-N-Load and a selection of bullet bushings, the ogive-to-lands distance can be easily adjusted for a new lot – or even a different bullet, as sometimes individual rifles “prefer” all bullets seated a specific distance from the lands. As an example, the “ogive length” of the Barnes 130-grain TTSX bullets Eileen uses in her custom .308 Winchester measure 2.709 inches from the rear of the case to the front of Hornady’s 6-27 bushing.
Seating bullets to a certain depth involves turning the seating stem in its threads. The easiest method is to use micrometer seating dies, with the die marked in .001-inch hashmarks. However, standard seating dies can also be pretty precise, if you measure their thread-pitch, then calculate how much seating depth will change with one turn of the stem.
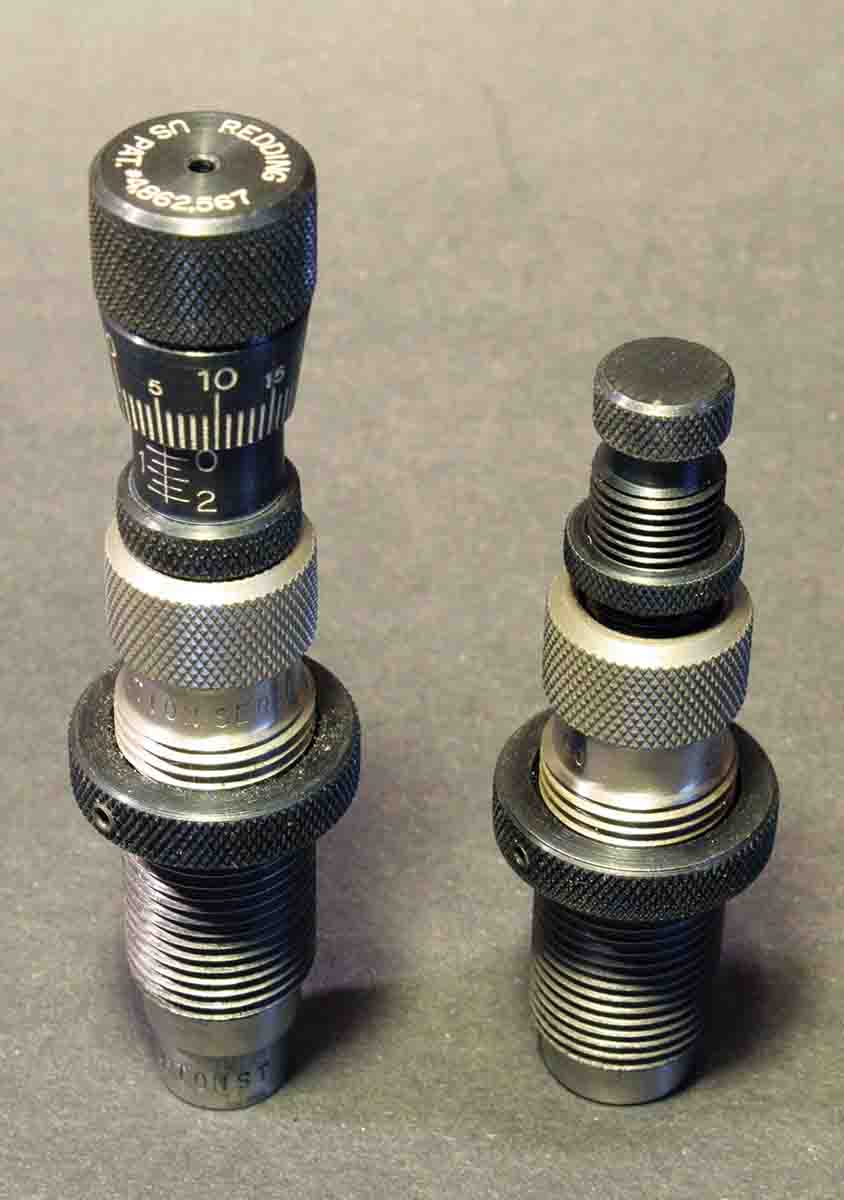
I set a caliper at 1 inch, then placed the jaws next to the threads and count the threads in that inch. As an example, in Redding’s standard seating dies, all measured so far have had 20 threads per inch – .05 inch per complete turn. A quarter-turn results in a .0125 inch change in seating depth, which is easy to see if you mark the knob of the stem. This is why many of my non-micrometer seating dies have a small notch filed in the adjustment knob’s edge.
With another bushing, the Hornady tool can also measure how much the shoulder of rimless cases gets, is set back during full-length resizing. This information can be used to resize cases just enough to chamber easily, yet prevent excessive case stretching – another way precise measuring can save time and money.
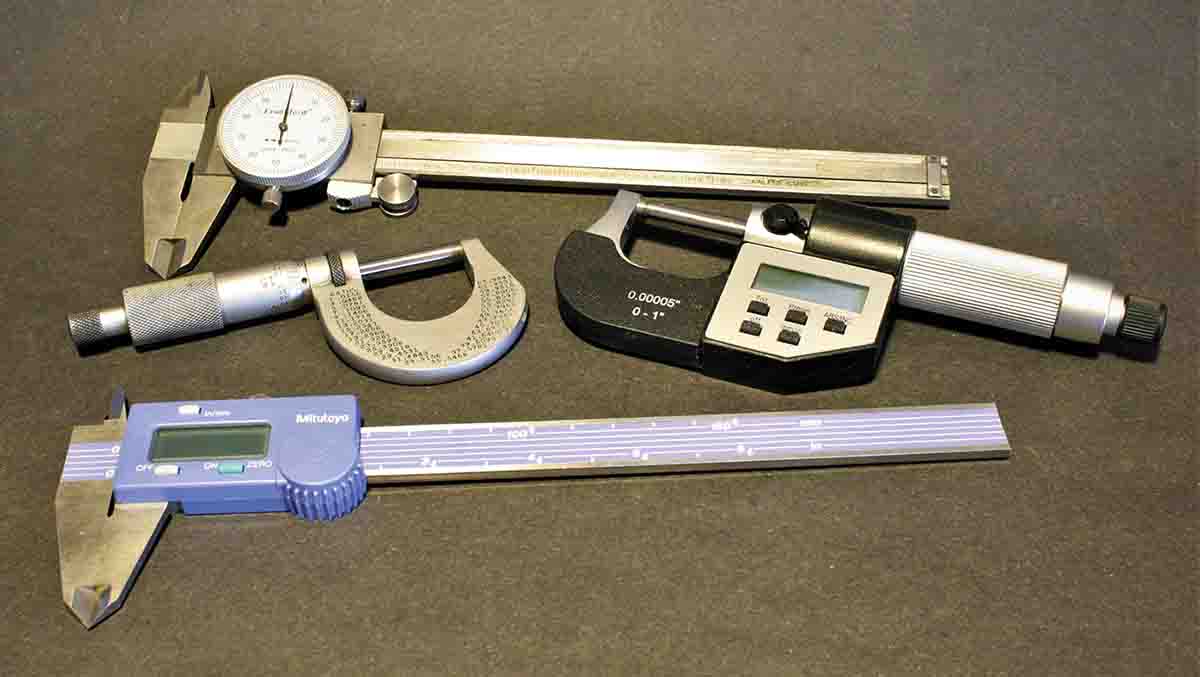
Of course, careful measuring cannot require an accurate caliper and, sometimes, micrometer. I purchased my first of each around 35/40 years ago, and while my first micrometer (a vernier Starrett ordered from Brownells) still works fine, the cheap caliper wore out quickly. Luckily, my handloading budget rose after that, and since then, several others have joined the collection, including a digital Mitutoyo caliper and digital Starrett micrometer. (This collection is handy, because somehow a second loading room appeared several years after we purchased our present home in 1998.)
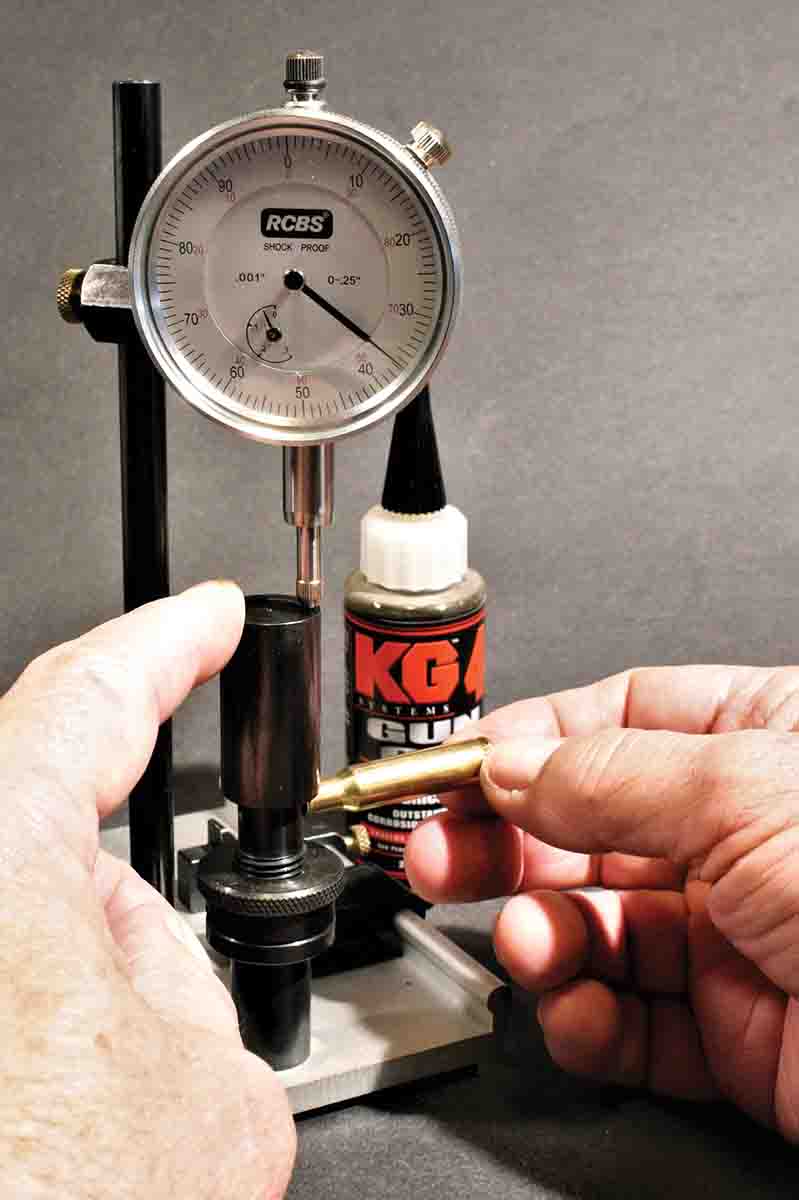
Another measuring tool in near- constant use is an RCBS Casemaster Gauging Tool, used primarily to see how straightly bullets are seated. Many companies offer excellent bullet-alignment gauges, but I use my Casemaster most often, because it also includes a tool to measure neck thickness – and lopsided necks, thicker on one side than the other, definitely affect bullet alignment.
The neck-thickness gauge consists of a vertical steel rod inside a close-fitting steel tube, the tube resting on a thin, short rod mounted at a 90-degree angle to the vertical rod. In use, the dial gauge on the Casemaster is swung over to the top of the tube, and a case neck is pushed over the short rod. Then turn the case while watching the dial gauge. (See photo.)
In general, I find this easier and quicker than the ball-micrometers typically used to measure neck thickness. For one thing, it doesn’t register every little imperfection in the surface of the brass. Instead, it provided an overall measurement. Results are more consistent, especially with new brass, if the necks are first pushed over an expander ball, removing any dents, then trimmed and chamfered.
Also, while turning the case, I push down slightly with my left forefinger on the top of the measuring sleeve and lightly oil the neck rod, allowing the case to turn easily and smoothly. Both also help in obtaining consistent readings. All these measurements take time, but also save a lot of time – and components.